Field Trip Lunch Box: Project Overview
Submitted by: Jon Hiebl, Ashland High School and Laurence Charlier, Maple School District
- Equipment Used: 3D Printer, Hand Tools, Power Tools, General Fab Lab Equipment
- Time Required: 10-15 Class Days (500-650 minutes)
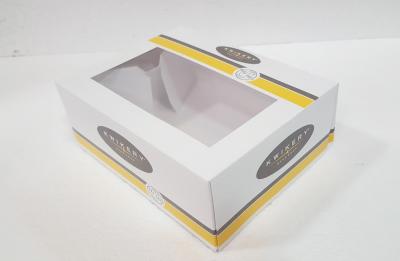
For this project, students will work to design and engineer a lunch box for going on a field trip with their classmates. The box must allow the teacher to easily pack it while not damaging the food (e.g, bruising fruit, crushing chips, smashing sandwiches, etc.) and be made of environmentally friendly materials.
Scenario, Criteria and Constraints
(Teacher performs a skit in front of students. Rushing to pack lunches for a field trip.)
We are going on a field trip! We are going to get bag lunches from the school. What do we get? Have students list the items, and then add or modify to complete list. Then, the teacher places all the Items in front of them: "now how do you get these to 70 students and on the bus? I, the teacher, have to do that." Show a typical brown paper bag, mentioning that the teacher is not a trained grocery packer and you have 10 minutes to pack 70 lunches with everything while still serving breakfast for the rest of the school. Then, start throwing in the items--sandwich, cheese, chips, and then chuck the fruit in (break and crush chips, bag falls over, contents fall out). Stand bag back up and roll it up (it's a bumpy ride, so shake it around). There is also turbulence and mishandling (drop the bag a couple of times walking around the room). Then, finally, in dramatic, revealing fashion, pull out the contents and open and show students.
Ask: How many of you want a crushed PB & J? Open the bag of chips. How many of you want the crushed chips off the bottom of the pile of lunches? Who wants a bruised apple? We have a problem here, and I think it is with the design of our lunch container. What can we do?
We need to create a new lunch container that satisfies the following:
- Stored flat.
- Recyclable, biodegradable.
- Easy to assemble.
- Appropriate volume to hold/store required contents.
- Protects contents - sturdy, stacking, stand up.
- Organizes contents - easy making/packing contents.
- Activity label or logo for aesthetics.
Handouts
Materials
- Computers with Internet access and Microsoft PowerPoint software.
- Pencils and paper or notebook.
- Measuring rulers or tape measures.
- Materials for device fabrication, such as various woods, plastics, metals, cardboard, etc., as specified by the students.
- Hand tools for cutting, shaping, forming, joining, fabricating, assembling and finishing designs.
- Food for testing productions.
- An assortment of fabrication tools and adhesives to work with the materials, such as scissors, twine, glue, and tape.
Learning Outcomes
After completing this activity, students should be able to:
- Analyze a product's components and functions.
- Recognize a design need or engineering challenge.
- Develop, sketch, and discuss possible solutions and select one.
- Select appropriate materials for a design solution.
- Construct a working model using a variety of materials.
- Use, evaluate, and suggest ways to improve a product.
